

<Pytorch serving : Docker로 시작하기 1편> 을 보시려면 아래 링크로 들어가 주세요.
[TorchServe / Docker] Pytorch serving : Docker로 시작하기 1편
Pytorch로 개발된 모델을 Deploy 하기 위해서는 TorchServe, ONNX Runtime, TensorRT, Amazon SageMaker, Kubeflow 등의 도구들이 있다. 오늘은 Torchserve로 pytorch 모델을 Deploy 하는 방법을 소개하고자 한다. Torchserve를 사
kjwony.tistory.com
전 편에서는 Docker로 Torchserve를 설치하고 Torchserve에서 제공하는 예제 스크립트를 서빙해 보는 실습을 진행했습니다. 이번 편에서는 직접 훈련한 모델을 dockerfile을 통해 환경을 구축하고, mar file을 만들어 서빙해보는 과정을 진행하겠습니다.
1. Custom handler 작성하기
먼저 본인이 훈련한 모델의 체크포인트와 inference 코드가 있다고 할 때, 체크포인트 파일과 inference 코드 파일을 사용하여 mar 파일을 만들 수 있습니다. 이때 inference 코드를 가지고 handler 파일을 만들 수 있습니다. handler 파일은 torchserve github에 가면 참고할 수 있습니다. 링크에 들어가게 되면, 다양한 handler 파일이 존재하는데, 자신의 모델이 어떤 모델인가에 따라서 참조하는 handler 파일은 달라집니다. 예를들어 text classification 모델이라면 text_classifier.py 혹은 text_handler.py 코드를 참조하고, image를 다루는 모델이라면, image handler를 참조하여 custom handler 파일을 작성할 수 있습니다.
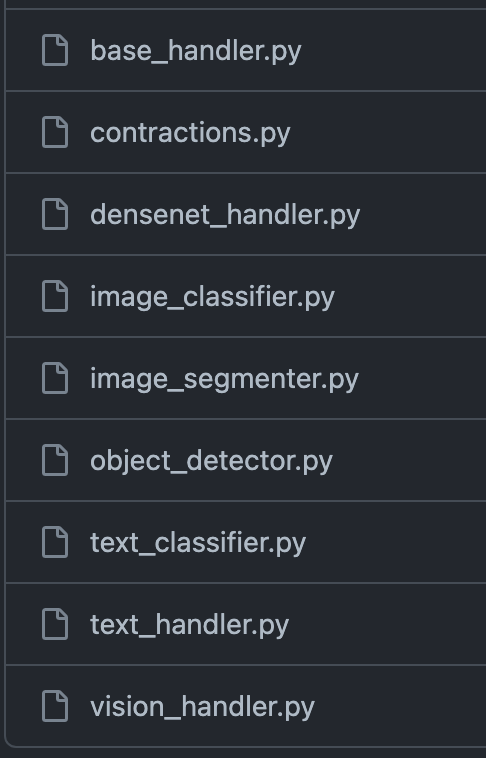
text_handler.py 파일을 예시로 살펴봅니다. 모델의 종류와 처리해야할 데이터의 포맷에 따라 코드가 달라지겠지만, handler 파일은 대부분 비슷한 구조를 가집니다.
1) 필요한 모듈 import 하기
"""
Base module for all text based default handler.
Contains various text based utility methods
"""
import logging
import os
import re
import string
import unicodedata
from abc import ABC

import torch
import torch.nn.functional as F
from captum.attr import LayerIntegratedGradients
from torchtext.data.utils import get_tokenizer

from ..utils.util import CLEANUP_REGEX
from .base_handler import BaseHandler
from .contractions import CONTRACTION_MAP

logger = logging.getLogger(__name__)
2) Class를 정의하고 모델 불러오기
class TextHandler(BaseHandler, ABC):
    """
    Base class for all text based default handler.
    Contains various text based utility methods
    """

    def __init__(self):
        super().__init__()
        self.source_vocab = None
        self.tokenizer = get_tokenizer("basic_english")
        self.input_text = None
        self.lig = None
        self.initialized = None

    def initialize(self, context):
        """
        Loads the model and Initializes the necessary artifacts
        """
        super().initialize(context)
        self.initialized = False
        source_vocab = (
            self.manifest["model"]["sourceVocab"]
            if "sourceVocab" in self.manifest["model"]
            else None
        )
        if source_vocab:
            # Backward compatibility
            self.source_vocab = torch.load(source_vocab)
        else:
            self.source_vocab = torch.load(self.get_source_vocab_path(context))
        # Captum initialization
        self.lig = LayerIntegratedGradients(self.model, self.model.embedding)
        self.initialized = True
initialize 함수를 통해 모델과 vocab을 로드합니다.
3) input으로 들어온 text에 대한 Preprocess 진행
def preprocess(self, data):
        """Normalizes the input text for PyTorch model using following basic cleanup operations :
            - remove html tags
            - lowercase all text
            - expand contractions [like I'd -> I would, don't -> do not]
            - remove accented characters
            - remove punctuations
        Converts the normalized text to tensor using the source_vocab.

        Args:
            data (str): The input data is in the form of a string

        Returns:
            (Tensor): Text Tensor is returned after perfoming the pre-processing operations
            (str): The raw input is also returned in this function
        """

        # Compat layer: normally the envelope should just return the data
        # directly, but older versions of Torchserve didn't have envelope.
        # Processing only the first input, not handling batch inference

        line = data[0]
        text = line.get("data") or line.get("body")
        # Decode text if not a str but bytes or bytearray
        if isinstance(text, (bytes, bytearray)):
            text = text.decode("utf-8")

        text = self._remove_html_tags(text)
        text = text.lower()
        text = self._expand_contractions(text)
        text = self._remove_accented_characters(text)
        text = self._remove_punctuation(text)
        text = self._tokenize(text)
        text_tensor = torch.as_tensor(
            [self.source_vocab[token] for token in ngrams_iterator(text, self.ngrams)],
            device=self.device,
        )
        return text_tensor, text
4) Preprocess가 끝난 text에 대한 모델 inference 진행
def inference(self, data, *args, **kwargs):
        """The Inference Request is made through this function and the user
        needs to override the inference function to customize it.

        Args:
            data (torch tensor): The data is in the form of Torch Tensor
                                 whose shape should match that of the
                                  Model Input shape.

        Returns:
            (Torch Tensor): The predicted response from the model is returned
                            in this function.
        """
        text_tensor, _ = data
        offsets = torch.as_tensor([0], device=self.device)
        return super().inference(text_tensor, offsets)
5) 모델의 output에 대한 postprocess를 통해 최종 output 리턴
def postprocess(self, data):
        """
        The post process function converts the prediction response into a
           Torchserve compatible format

        Args:
            data (Torch Tensor): The data parameter comes from the prediction output
            output_explain (None): Defaults to None.

        Returns:
            (list): Returns the response containing the predictions and explanations
                    (if the Endpoint is hit).It takes the form of a list of dictionary.
        """
        data = F.softmax(data)
        data = data.tolist()
        return map_class_to_label(data, self.mapping)
6) Class를 handle하는 코드를 통해 Class를 불러오고 실행
 def handle(self, data, context):
    """
    Entry point for default handler
    """

    # It can be used for pre or post processing if needed as additional request
    # information is available in context
    start_time = time.time()

    self.context = context
    metrics = self.context.metrics

    values = []
    for row in data:
        image = row.get("data") or row.get("body")
        tensor = torch.load(io.BytesIO(image))
        values.append(tensor)
    data = self.inference(torch.stack(values))

    stop_time = time.time()
    metrics.add_time(
        "HandlerTime", round((stop_time - start_time) * 1000, 2), None, "ms"
    )
    return [data]
Handler.py 코드의 형식은 정해진 것은 아니지만, 대부분 이런 형식을 가집니다. 각 모델이 필요한 input과 output에 따라 handler 파일을 작성하면 됩니다.
2. create-mar.sh 작성하기
create-mar.sh 은 docker 안에서 mar 파일을 만들어주는 bash script입니다. docker 안에서 모델을 실행하고 inference를 하려고 하기 때문에 mar 파일 역시 docker 안에서 만들어줍니다.
#!/bin/bash

mkdir /[myworkdir]/model_store

torch-model-archiver --model-name [mymodel] \
--version 1.0 --serialized-file /[myworkdir]/model/pytorch_model.bin \
--handler /[myworkdir]/src/my_handler.py \
--extra-files "/[mymodeldir]/model/config.json,/[mymodeldir]/model/merges.txt..." \
--export-path "/[mymodeldir]/model_store"
torch-model-archiver를 통해 mar 파일을 만드는 것은 동일하나, handler argument에 본인이 직접 만든 handler 파일을 넣고, extra files argument에 모델을 동작하기 위한 모든 필요한 파일 혹은 폴더를 넣어줍니다.
4. config.properties 작성하기
https://pytorch.org/serve/configuration.html 의 5.3.3을 참조해서 torchserve를 실행할 때, parameter를 주는 파일을 생성합니다.
model_server_home=[myworkdir]
model_store=/[myworkdir]/model_store
workflow_store=/[myworkdir]/model_store
load_models=all
inference_address=http://0.0.0.0:8080
management_address=http://0.0.0.0:8081
metrics_address=http://0.0.0.0:8082

# grpc_inference_port=7000
# grpc_management_port=7001

# cors_allowed_origin is required to enable CORS, use '*' or your domain name
cors_allowed_origin=*
# required if you want to use preflight request
cors_allowed_methods=GET, POST, PUT, OPTIONS
# required if the request has an Access-Control-Request-Headers header
#cors_allowed_headers=X-Custom-Header
5. Dockerfile 작성하기
docker를 이미지를 통해 컨테이너를 생성하고 동작시키는데, dockerfile은 이 이미지를 생성하기 위한 script라고 할 수 있습니다. dockerfile안에는 dockerfile 만의 문법으로, 원하는 패키지와 파일들을 설치합니다.
FROM pytorch/torchserve

# setting workdir in the container
WORKDIR /[myworkdir]

# change user and change permissions
USER root
RUN chmod 777 -R .

# copy the files in to workdir
COPY ./src /[myworkdir]/src

# get model
COPY ./model /[myworkdir]/model

# install the requirements
RUN pip install -r /[myworkdir]/src/requirements.txt

RUN apt-get update
RUN apt install zip unzip

# create mar
RUN bash /[myworkdir]/src/create-mar.sh

# start the server
CMD ["torchserve", "--start", "--ts-config", "/[myworkdir]/src/config.properties"]
# ENTRYPOIN
위 코드는 myworkdir 라는 폴더에 docker안에 있어야하는 source 파일, model 을 복사하고, docker 안에서 설치해야하는 패키지 목록을 requirements.txt 파일 안에 정의하고, 이를 docker 컨테이너 안에서 설치합니다.
source 폴더 안에는 create-mar.sh 라는 shell script가 있고, 이는 docker 안에서 mar file를 만들어주는 bash script 입니다.
6. Docker image build 하기
작업 폴더 안에 지금까지 작성했던 Dockerfile과 model checkpoint가 들어있는 model 폴더, 커스텀 핸들러 파일인 myhandler.py, mar file을 생성하기 위한 create-mar.sh 파일을 포함한 모델을 실행시키기 위한 기타 파일들을 넣어줍니다.
.
├── Dockerfile # Dockerfile
├── model/ # model checkpoint folder
└── src
		├── myhandler.py # handler file
		├── config.properties # docker config
		├── create-mar.sh # create mar file
		├── requirements.txt # requirement.txt
		└── utils.py # utils (optional)
dockerfile을 통해 docker image를 build 해줍니다. 콘솔 창에 docker build를 통해 실행합니다.
$ sudo docker build -t [myproject] .
명령어를 실행시키면 [myproject]라는 이름의 image가 생성됩니다. 'sudo docker images'를 통해 docker image 리스트를 출력할 수 있습니다.
$ sudo docker images

REPOSITORY              TAG                 IMAGE ID            CREATED             SIZE
myproject              latest              ff2fdkze9b0        1 minutes ago          1GB
7. Docker container 실행하기
sudo docker run --gpus '"device=1"' --rm -it -p 3002:8080 -p 3003:8081 myproject:latest \
torchserve --start --model-store model_store --models myproject=myproject.mar --ts-config /[myprojectdir]/src/config.properties
gpu를 사용하는 모델일 경우 --gpus 라는 옵션 뒤에 ‘”device=1”’ 이렇게 원하는 gpu 숫자를 입력합니다. -d 옵션을 통해서 daemon으로 돌릴 수도 있습니다.
8. Docker container 내부에서 실행 확인
# CONTAINER ID 확인
$ sudo docker ps

# CONTAINER 로 들어가기
$ sudo docker exec -it [CONTAINER ID] bash
9. Healthy 정보 출력하기
# Health check API
# If the server is running, the response is: Healthy
$ curl -X OPTIONS "http://localhost:3002/ping"
참고:
https://docs.docker.com/engine/install/ubuntu/
https://github.com/pytorch/serve
'MLOps' 카테고리의 다른 글
| [TorchServe / Docker] Pytorch serving : Docker로 시작하기 1편 (0) | 2023.05.04 |
|---|